Showing posts sorted by relevance for query disney. Sort by date Show all posts

Wednesday, June 23, 2010

Disney World Tips for Traveling with Toddlers

Before our trip to Disney last week I must have read every travel guide and website I could get my hands on. I loved preparing for the trip, and I put so much work into it I thought that I would share some of my favorite tips in hopes that it helps some of you who may be planning a visit. It's a different trip when you're planning for two toddlers (our little Owen, age 2 1/2, and our nephew Noah, who is almost 4). I'll tell you what worked and what didn't for our family.
Our general itinerary was:
  • Tuesday- Fly in and grocery store (Disney Grocery List)
  • Wednesday- Magic Kingdom (I HIGHLY recommend this park for any age)
  • Thursday- "Down" day
  • Friday- Epcot (Not a lot to do for toddlers, but a great firework show in the evening!)
  • Saturday- "Down" day and fly home in the evening
If you're interested, this is our Disney Master Itinerary. I carried around a copy of this where ever we went and it came in handy many, many times.

My best packing tip is to think through what you need starting with your feet and working your way up to your head. Here's our Disney Packing Lists (with lists for the trip, plane and park).

Let me start by telling you about my favorite guide books and websites:
Best Guide Books:
Birnbaum's 2010 Walt Disney World for Kids: This was a great book written for kids, by kids. I didn't actually read it to Owen because it's written for an older audience (about 6-13 year olds), but I took a lot of the advice to heart and Owen loved the pictures.
The Unofficial Guide to Walt Disney World 2010: By far the best guide book I read! There's a ton of detailed information about every single thing you might want to know. It's not written with a bias like many of the guide books... the authors are real and they tell you what will really work and what's not worth your time!
Best Websites:
MouseSavers.com- Great section on free stuff to do on your "down" days that don't require a ticket to the park, coupons and insider info that is updated constantly.
Disney Mom's Panel- A million and one questions only moms would think up with excellent answers.
Disney Park Hours- Type in your dates and your park of choice and Disney will give you the schedule of events for that day. Very helpful in planning what time to go and when to leave the park for nap time before heading back for fireworks and the parade.

The biggest debate is whether or not you should bring your own stroller or rent one at the park. It's hard to find a picture of the park stroller, so I took one for you. This is a double stroller. The pros of renting it: it's sturdy. That's about it. It has horrible storage, it's hard to find when you get out of a ride because everyone's looks alike, it doesn't recline for sleepy ones, it's expensive and it's not good for kids under 2 because of the poor support. There... that's my opinion!
Rather than rent one, we brought our own. A huge plus to that is the fact that you'll have a stroller on the plane and on your days away from the park. We just wheeled ours right up to the gate of the airplane and checked it at the gate, then it was waiting for us as soon as we stepped off of the airplane! It's also nice because you're not allowed to take rented strollers on the Disney train (at Magic Kingdom) and we used the train a bunch to get around once we were in the park.
Another thing to think about are your "down" days. We opted for a character breakfast at the Contemporary Resort (they call it "Chef Mickey"). When choosing a character breakfast, choose it based on the characters that will be there and the price. While it was a nice time to meet each of the characters because they came to your table and spent one-on-one time with each person, it was super expensive and the kids can see the characters at the parks for "free". The food wasn't that great either for the price. If you're opting for a park hopper pass, I think the best place to see the characters would be at Epcot. I wouldn't suggest Epcot for little ones, but if you have a park hopper pass (allowing you to move from park to park throughout the day) I would suggest coming to Epcot after your nap time in the later afternoon. Then you could see the characters and stick around for Epcot's fabulous light and firework show.
Our favorite "down" day activity was taking the monorail around to each of the different resorts and touring them, then going to downtown Disney for dinner or lunch at Earl of Sandwich. Both activities do not require a park pass and are free for touring. Downtown Disney has a ton of great activities and shops for a rainy day too.

What tips do you have? What questions do you have? I'd love to hear from you!

Tuesday, June 8, 2010

Mouse Mail

Someone special sent Owen and his cousin Noah a letter today!
Straight from Disney World (umm...sorta!) to our mailboxes.
My little guy couldn't have been more excited to be invited to come visit the Main Mouse at his house next week! (How nice of Mickey to remind him to be a good boy until then!)
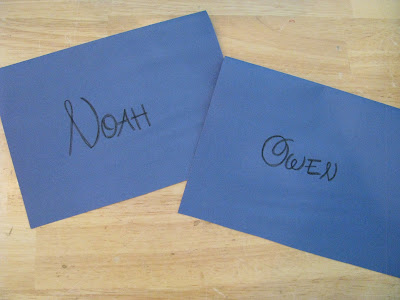
I also wrote up a note for the boys to open each morning that they are in Disney telling them what's to come that day. Won't that be fun!? Here's the font I modeled my letters after.

I think I'm just as excited as they are!! I've read almost every Disney guidebook on the East Coast to get ready. Once I get back maybe I'll offer some tips about what worked (and didn't) with two toddlers (age 2 1/2 and 4). Would that be helpful?

Tuesday, June 1, 2010

Road Trip Backpack Pillow

We'll be hitting the road for Disney in a couple of weeks, so I wanted to make Owen a fun bag for the trip.
The idea for this Backpack Pillow has been floating around in my head for a while now after seeing Traci's Road Trip Pillowcases that her mom had made for her when she was little. I loved her idea of putting a handle on the pillow I was sure to be lugging around the airport for Owen if it wasn't attached to him!
I also loved her idea of the pocket on the pillow so O-man could have all of his coloring books and snacks and toy trucks close by, but I knew that this would need to be a big pocket to fit all of his favorite things... then I remembered Dana's Hobo Sack!
So I'm thinking, "Perfect, if only the Hobo Sack were attached to the pillow, then he could carry the pillow around with him on his back...
and why not have the pillow detach from the backpack with snaps so he's not laying his head on bumpy cars... (At this point in my thought process I'm getting really excited, can you tell!?)
then he can carry the detached backpack around without the pillow whenever a pillow isn't needed!"
So when I stumbled on this adorable Michael Miller fabric called "Signs of the Times" it was the icing on the cake!
My sewing machine and I hummed away for a few hours and we created something I'm so excited about... perfect for our road trip! Disney, here we come!

Monday, June 21, 2010

Address Cuff Tutorial

Just returned from Disney!! (And we're still a little sleep deprived!) I plan to post some Disney tips and lists very soon, so be on the lookout for those.

My bags were packed and I was ready to go, but with only one problem... they were not identified. Sure I could have grabbed a little paper tag at the airport and quickly scratch out my name while I was trying to wrangle two toddlers and 8 bags of stuff in the check-in line.... yikes! Not a good scenario!
So I whipped up these address cuffs really quickly. They took about 15 minutes each. Super easy and they upped the cute quotient on my bags considerably!
Wanna make some? Here's what you'll need:
  • 4 1/2 by 3 3/4 inch piece of fabric
  • 1 by 2 inch piece of thick, flexible plastic (I cut up a bag that some new bedding came in. You could also use an old shower curtain or a thick plastic bag... something like that.)
  • Card stock paper
  • Snaps
  • Note: All seam allowances are 1/4 inch unless otherwise specified
First, fold the fabric in thirds lengthwise so that the top and bottom sides overlap about 1/2 inch, then iron to make creases that will serve as guidelines. Draw a rectangle on the wrong side of your fabric in the middle of the two ironed creases. Cut the fabric in the center of the rectangle in an "X" pattern with the ends of the "X" in the corners of the rectangle.
Next, press the flaps of the "X" down like the picture below.
Starting about 1/4 inch from the edge of the rectangle, sew a larger rectangle around the perimeter of the cut out rectangle to make your address window. After this step you can cut the excess fabric from the "X" flaps.
Then place your plastic on top of the window on the wrong side of your fabric and sew it down. It's slippery, so you'll want to pin it in place and sew slowly to prevent it from moving.Next, fold over the right and left sides of the address cuff and sew them down.
Fold the cuff in half lengthwise and sew down the length of the cuff.
Before you flip the cuff inside out to see the prettier side of your project you'll want to press down the seams. Be careful to turn down the heat on your iron and press quickly so that your plastic doesn't shrivel.
Now for the fun part! Turn your cuff inside out and press again.
For the snaps, you'll want to follow these directions carefully or you won't be able to switch your information out if you ever move. Install the "female" side of the snap completely through one side of the project, so that the side of the snap that will receive the other side is facing the back (like the snap on the left side in the picture below). For the "male" side of the snap, you'll want to install it so that it faces the front of your cuff (like the snap of the right side in the picture below). Be sure that you don't install it through your entire project though... just the front half of the cuff.
Snaps installed correctly will allow the cuff to wrap around your luggage strap like this:
Finally, cut a small piece of card stock paper, write your information on it and slip it in place. Thanks for all of your excellent comments and suggestions on my last post! One of my favorite comments came from Rebecca who said, "Replace your address with your email address and mobile phone number. That way someone who finds your lost bag can get in contact with you to return it, but a less-than honest person that finds it can't use the house keys inside to break in."
That is a great suggestion and I wish I had done that on my cuffs so you wouldn't have to look at my address all edited out. Genius!

Sunday, June 5, 2011

1,700 Mile Road Trip, No DVD Player, How We Did It

We just made it home after a 1,700 mile road trip with our two boys, Owen 3 1/2 and Trey 9 months. You read that title right, we didn't have any electronic toys or DVD player and seriously, we didn't pull our hair out either! I'll let you in on a few of our secrets.
1. Pack new little toys
No need to spend a lot of money. Stash away McDonald's toys before they are played with or trinkets from birthday parties and pull them out slowly throughout the trip. The key here is to pack only things your kids haven't seen yet.

For pre-schoolers, think about bringing: coloring book, stickers, Highlights magazine, toy cars. For babies, think about bringing: baby toothbrush, ball, water bottle, chew toys, books with plastic pages.

Bring only one new toy out at a time, don't offer them all at once. When you control the amount of time each toy is played with you can stretch it out a lot longer.

2. Set up a work station
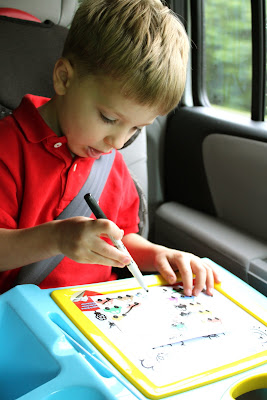
Give them a place to work or eat. I bought Owen this lap board at Target before we left. It was $9 and has a place for storage and a magnetic drawing board on top. It was great for snacking, drawing roads for his toy cars, he even used it as a pretend drum set!
3. Pack smart snacks
One thing you don't want to feed your kid when they are going to be stuck in the car for a while is a lot of sugar. Pack snacks that are easy to eat, but not messy. Drink water, not juice. Some examples of smart snacks might be: apple slices (that you cut up ahead of time), trail mix, goldfish crackers, and dried apricots. Don't forget to throw in a few small trash bags, wipes and napkins before you leave to clean up spills. (I love this idea for collecting trash!)

4. Set up a reward system
I created a ticket system for rewarding good behavior. Here's how it worked: When Kyle and I saw Owen have good behavior (being patient while Trey cried, sharing toys, saying "excuse me" when he wanted to talk to us, having a good attitude) we would give him a "ticket." Five tickets earned a special surprise for him. I chose a surprise for him out of my bag (a new matchbox car, bubble gum, a go-fish card game etc.) Again, not letting him see all of the other surprises to keep the element of suspense alive.

It took a while to earn 5 tickets and we had a rule that he wasn't allowed to ask for a ticket. This was a fun way of turning our focus towards the good behavior. The tickets were just small, laminated pieces of paper that said:

1. "Way to go! Ticket numero uno!"
2. "Look at you! Ticket number two!"
3. "Wow-wee, ticket number three!"
4. "Only one more, ticket number four!"
5. Owen's the man! Ticket number five! (OK, so the last one doesn't rhyme too well... whatevs.)
5. Stock up on books
I know I say it all the time and you're probably super sick of hearing me talk about how much I love my library (and have my 14-digit library card number memorized... a feat for me!!) but I have to say it one more time... I'm obsessed with my library! We go once a week. Before a big trip I stock up on books for Owen that have lots of interesting pictures and I make sure that they are hidden so that he sees them for the first time in the car. He'll flip through a book for a good 10 to 15 minutes! This time he "read" about electricity, race cars, trucks, trains, and space. The Eyewitness Books are our favorites and spur many interesting conversations.

6. Scheduling
Three hours of driving was our limit. Maybe yours is different, you'll just have to wait and see. Owen and Trey would hit a wall at three hours and we would need to take at least a 20 minute stop, get out, run around and play. We found that these breaks were so very important.

Try to keep your normal daily schedule like you would if you were home. (Meal times, nap time, snack time, bed time routine, etc.) A quick note here about lovies: I tried to keep the blankets and Trey's paci away from them until it was nap time, then we would try to soothe the boys with calmer music and quieter voices. Bringing out their blankets and Trey's paci then would usually do the trick to put them to sleep. Don't expect a normal nap in the car though!
7. Play games
Some of our favorite car games are:
  • I spy (To make the game a little more generic, we also say "I spy a circle" and Owen has to find anything that's a circle.)
  • Rhyming Game (I say a word and he has to say a word that rhymes with it and then we switch)
  • Color mixing game ("What two colors make purple?" or "How do you make green?")
  • Active listening game (we listen to music and try to tap to the drum beat or listen for the clapping or name the different instruments we hear)
There's a great road trip bingo and other printable games Owen enjoyed here. It also helped to have a map of our trip laminated so he could see where we were going and where we had been. I laminated a small map from our local AAA office that he loved to check.

So are you planning a road trip with the kids this summer? Don't be nervous, you can totally do it! It's really only as hard as you make it and I hope these few tips will help you out. Here are a couple of additional resources that might be helpful too:

Monday, July 15, 2013

Smart Summer: Planes, Trains and Cars

It's week six of our Super Smart Summer Plan!  If you're wondering what in the world I'm talking about, start here to read about the laid back learning plan I created for my boys this summer and to see a list of our past learning activities.

Beep Beep... it's all about transportation this week.

Super Smart Summer... "Planes, Trains and Cars" Week

Movies:
-Disney's Cars

Outings:
-The airport  Our airport has an observation deck where you can watch the commercial planes land.  There is also a private jet terminal that is open to the public.  Do some research to see if something like that is available in your area.  We were surprised to find out that the private jet terminal is actually paid for with tax payers' dollars so anyone can come and go.  My boys love watching the jets land!
-Train station

Books:

Activities:
-Marble Run- To learn about highways and roads we made a marble run two different ways:
Out of paper plates... (Idea came from Frugal Fun For Boys)
...and out of a pool noodle.  The pool noodle race track ended up being our favorite.  To make sure you cut the noodle evenly I'd recommend putting one of the ends on the floor and use a serrated knife to slice away from you and towards the floor while looking down the middle of the noodle.
-Kids Drivers License Test- The House of Hendrix has a great post and some free printables that we used for this activity.  We talked about the importance of a drivers license and the fact that mommy and daddy had to pass a two part test to get ours.  We did a driving test outside with an obstacle course.
Daddy taught the boys about red and green lights.
Then Owen took the written portion of his driving test.  It included questions about safety and making good choices.
In the end we had two new licensed drivers on the road!  (Check out The House of Hendricks blog for the written driver's test and a license that you can personalize for your kids!)
Snacks:
-Trader Joe's Cheddar Rockets or fruit gummies in the shape of cars
-Make "roads" out of pretzel rods or fruit roll ups.

You can find links to more ideas and coloring pages on my "Smart Summer" Pinterest board.

Monday, August 5, 2013

Smart Summer: Beach Days and Under the Sea

I decided to combine week nine and ten of our Super Smart Summer Plan because you know, we all needed a break from the usual!  If you're new here, start here to read about our laid back learning plan.

Super Smart Summer... "Beach Days and Under the Sea" Weeks

Movies:
-Disney's Little Mermaid

Outings:
-Beach
-Aquarium
-Pool

Books:
-"The Rainbow Fish" by Marcus Pfister
-"One Fish, Two Fish, Red Fish, Blue Fish" by Dr. Seuss

Activities:
-Shell creatures- This is one of our favorite activities to do at the beach!  When I was a little girl, my grandmother introduced me to her beautiful collection of tropical shells from all over the world then handed me a glue gun and let my imagination go to work.  We created all kinds of silly creatures together with those shells.

A couple of years ago I let Owen decorate a treasure box and try his hand at it.  This is what he came up with, and this is Martha Stewart's rendition.

-Sink and float activity- Collect a bunch of little items around the house and test each to see which sink and which float.  

-Paint shells-

-Shell sorting- Sort shells by color, size shape, texture

-Message in a bottle- What a great way to practice handwriting... write a message and send it out to sea or bury it in the sand.  (You can always pick it up during nap time so you're not littering.)

-Shark attack- These were made using paper plates.  Chomp!

-Other activities and ideas for things to make and do at the beach can be found on my DIY at the Beach Pinterest page.

Snacks:
-Goldfish crackers
-Tuna salad on fish-shaped bread
-Blue jello with floating Swedish Fish- "Shark infested waters"
You can find links to more ideas and coloring pages on my "Smart Summer" Pinterest board.