Showing posts with label Organization. Show all posts

Sunday, November 24, 2013

A Neon Silly Monster Birthday Party

We chose the theme "Neon Silly Monster Party" for Trey's birthday.  How's that for adjective overload!?  Our middle man turned three this August and I'm just now getting a chance to tell you about it!  (But the party was super cute, so maybe you'll forgive me for being three months late.)  

I get asked all the time how I plan my parties, so here's a little behind-the-scenes, hopefully this former event planner can pass on a few tips that might be helpful for you...
When I get an idea for a party I jump on Pinterest first to see what other people have done.  I get the best ideas for color schemes and special touches that way, then I put my own spin on it.  In this case, there were plenty of monster parties out there, but I wanted it to be so colorful that my camera would scream for mercy!  (My Silly Monster Pinterest Board)


I always sketch out what I want my focal points to look like.  It helps me because I am so visual.  From there I can write "to do" and "to buy" lists.  I usually shop my own house first after I decide on a color scheme and that's when I found some neon pipe cleaners and glow sticks... it went crazy from there!

One pack of neon poster board became place mats and thank you notes.  

My sister-in-law owns a cookie business and they make the most amazing sugar cookies.  Usually sugar cookies look pretty but taste gross and are so hard you might just chip a tooth... not so with Southern Sugar Bakery!  These cookies taste even more amazing than they look!

She has a tiny projector and can project any image on to the cookie... custom logos, monograms, even Lilly Pulitzer fabric!  You've got to check out their Facebook page for more pictures.  (They ship anywhere in the world!!)  The cookies really took all of my meager decorations up to another level!
On to the table... lots of layering going on here.  It's a yellow table cloth, my poster board monster place mats, and the runner is just some wrapping paper that I liked folded in half, easy peasy!
 See what I mean about those cookies stealing the show!?  I know!
The cake was so much fun to make (and eat)!  It's just a ton of piped orange icing piled up in heaps on top and the eyes are blue dum-dums with peach rings wrapped around them.


There's the party animal right there, our silly monster three year old!  (Looks like my camera finally gave up on all of that neon!)


Thursday, June 6, 2013

::Craft Show Mini Series:: What To Bring

So I thought I would finish up the Mini Series that I started a while back about what I learned doing my first craft show.  I put in SO many hours of preparation and I would love it if you are able to benefit from some of my research.  Here's where we've been so far in this series... click on these for the full post:


Today I'm going to hit on "What to bring" and then I'll finish out this mini series with my tips on how to prepare.  Let's do this!!

There are a gazillion and one lists out there for what to bring to a craft show and you'll probably want to check those out if you're doing an outdoor show, but most of this will cross over.  Mine was an indoor show with the option of electricity provided.  I opted out (dumb!)  Lighting is so key to creating warmth and highlighting certain items.  I didn't think I needed it, but looking back I would definitely get it next time.

I had a giant clear plastic tub with my supplies, this made things easy to find when it got busy.
Inside my big tub I had two smaller containers... one for personal items:
-Lotion
-Mouth wash or gum
-Advil (You'll thank me after you've been standing for hours!)
-Brush
-Small mirror (What if that salad you ate for lunch is still stuck in your teeth.  The horror!)
-Hair tie
-Protein bar (or meal replacement bar)
-Tissues
-Chapstick
-Hand Sanitizer
One for "office supplies":
-Glue (for fixing any merchandise that breaks!)
-Pens
-String
-Scissors
-White out
-Duct tape
-Rubber Band
-Hammer
-Calculator (even if you have one on your phone, still bring a hand held... trust me!)
-Business cards!!!
-Tape
-Price tags
-Square credit card reader
-Phone
-Sharpie marker

I also brought a roll of paper towels and a trash bag for spills.
-Custom Order Forms
-Picture album for custom order ideas
-Inventory List
-Cash Box
-Gift bags
-Sales Receipt book
-Cash
-Signage
And I brought a project to work on during the slow parts of the show.  It was fun for me to be able to demonstrate how I make my scarves and it got people involved.
Wear a name tag with your logo!  It's a great way for people to associate you with your brand and to make you look professional!  I also recommend making a credit card sign so people will know that you'll take plastic!  That was a HUGE selling point for me!
And on the credit card front, I would highly recommend using the Square credit card reader.  They will send you one for free, it is easy to use, there is no up front fee and they just charge you a small fee per transaction.  Read all about it here.

This is my little sales station.  I have my cash box, calculator, Square, inventory list, receipt book and my gift wrap stuff all together.  It was a life saver to have all of this stuff in one place and quickly accessible.
This was my custom order form.  My customers liked being able to flip through a small photo album of the things I made to get ideas for different color combinations if something had already sold out.
What am I forgetting?  Is there anything you can't live without at your shows?  Please share!


UPDATE:  Here are the links to all five posts in this mini series:

Sunday, March 18, 2012

Kids Art Wall

Kyle was out of town this weekend. You know what they say, "While the cat is away, the mice will play."

And play is just what I did!
Two coats of fresh paint on a dreary hallway wall. A trip to Goodwill for some frames. I sanded, primed, painted, hung and then finished just as he was pulling in to the driveway!
I'm horrible at keeping my own secrets, but I kept this one under wraps all weekend and then surprised him with a project fully completed.

I'll be back with a full tutorial soon, but I'm heading to bed now. Staying up painting past midnight for the last few nights is catching up with me!

Tuesday, January 3, 2012

It's a new year... let's organize it!

Writing lists, keeping journals, logging successes, learning from failures, setting goals, planning for the future... it's a new year, I want it to be an organized one.

I made a pretty big realization the other day after listening to this CraftyPod podcast. I'm not an organized blogger. When an idea comes to my head I'll make it, photograph it and post about it without a whole lot of forethought. I want to be better at planning out my projects and posting ahead of time, that way I'll have time to improve on my writing and hopefully a more thoughtful blog will result.

That takes discipline and planning, so I did a little Pinterest search for "blog planner" and got some ideas. Here's an awesome planner for a week at a glance.
Photo from Wild Olive
I really wanted a month at a glance so I created my own.
It has space to write in each of my posts for the month along with ongoing ideas on things to make, photo, contact, research and do.
Email me if you want a copy, for some reason Google Docs is mad at me.
Maybe I'll have a planning day at the beginning of each month to plan that month's posts. If you ever have any ideas for something you'd like to see or hear about or if you just want to know about my favorite Christmas gift, shoot me an email and maybe I'll make a whole post out of it. Oh and if you have any suggestions for improvement I guess I want those emails too... ok, seriously, I want to hear it!

Sunday, June 5, 2011

1,700 Mile Road Trip, No DVD Player, How We Did It

We just made it home after a 1,700 mile road trip with our two boys, Owen 3 1/2 and Trey 9 months. You read that title right, we didn't have any electronic toys or DVD player and seriously, we didn't pull our hair out either! I'll let you in on a few of our secrets.
1. Pack new little toys
No need to spend a lot of money. Stash away McDonald's toys before they are played with or trinkets from birthday parties and pull them out slowly throughout the trip. The key here is to pack only things your kids haven't seen yet.

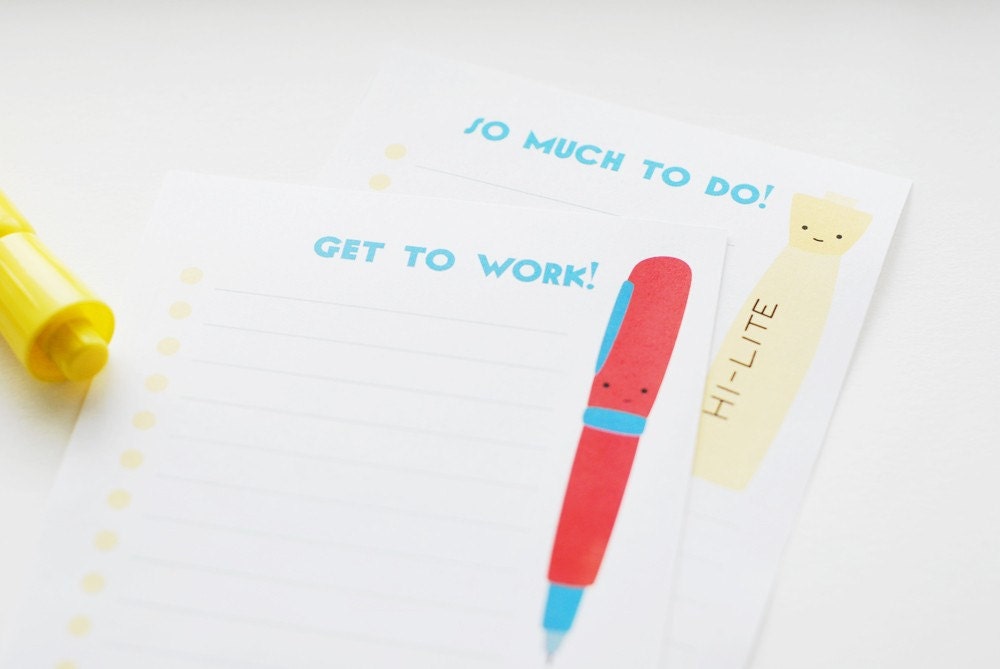
For pre-schoolers, think about bringing: coloring book, stickers, Highlights magazine, toy cars. For babies, think about bringing: baby toothbrush, ball, water bottle, chew toys, books with plastic pages.

Bring only one new toy out at a time, don't offer them all at once. When you control the amount of time each toy is played with you can stretch it out a lot longer.

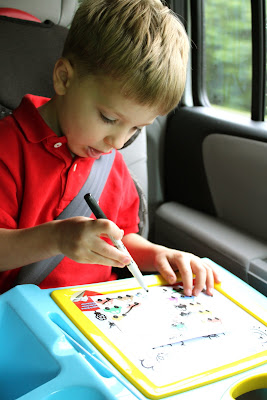
2. Set up a work station
Give them a place to work or eat. I bought Owen this lap board at Target before we left. It was $9 and has a place for storage and a magnetic drawing board on top. It was great for snacking, drawing roads for his toy cars, he even used it as a pretend drum set!
3. Pack smart snacks
One thing you don't want to feed your kid when they are going to be stuck in the car for a while is a lot of sugar. Pack snacks that are easy to eat, but not messy. Drink water, not juice. Some examples of smart snacks might be: apple slices (that you cut up ahead of time), trail mix, goldfish crackers, and dried apricots. Don't forget to throw in a few small trash bags, wipes and napkins before you leave to clean up spills. (I love this idea for collecting trash!)

4. Set up a reward system
I created a ticket system for rewarding good behavior. Here's how it worked: When Kyle and I saw Owen have good behavior (being patient while Trey cried, sharing toys, saying "excuse me" when he wanted to talk to us, having a good attitude) we would give him a "ticket." Five tickets earned a special surprise for him. I chose a surprise for him out of my bag (a new matchbox car, bubble gum, a go-fish card game etc.) Again, not letting him see all of the other surprises to keep the element of suspense alive.

It took a while to earn 5 tickets and we had a rule that he wasn't allowed to ask for a ticket. This was a fun way of turning our focus towards the good behavior. The tickets were just small, laminated pieces of paper that said:

1. "Way to go! Ticket numero uno!"
2. "Look at you! Ticket number two!"
3. "Wow-wee, ticket number three!"
4. "Only one more, ticket number four!"
5. Owen's the man! Ticket number five! (OK, so the last one doesn't rhyme too well... whatevs.)
5. Stock up on books
I know I say it all the time and you're probably super sick of hearing me talk about how much I love my library (and have my 14-digit library card number memorized... a feat for me!!) but I have to say it one more time... I'm obsessed with my library! We go once a week. Before a big trip I stock up on books for Owen that have lots of interesting pictures and I make sure that they are hidden so that he sees them for the first time in the car. He'll flip through a book for a good 10 to 15 minutes! This time he "read" about electricity, race cars, trucks, trains, and space. The Eyewitness Books are our favorites and spur many interesting conversations.

6. Scheduling
Three hours of driving was our limit. Maybe yours is different, you'll just have to wait and see. Owen and Trey would hit a wall at three hours and we would need to take at least a 20 minute stop, get out, run around and play. We found that these breaks were so very important.

Try to keep your normal daily schedule like you would if you were home. (Meal times, nap time, snack time, bed time routine, etc.) A quick note here about lovies: I tried to keep the blankets and Trey's paci away from them until it was nap time, then we would try to soothe the boys with calmer music and quieter voices. Bringing out their blankets and Trey's paci then would usually do the trick to put them to sleep. Don't expect a normal nap in the car though!
7. Play games
Some of our favorite car games are:
  • I spy (To make the game a little more generic, we also say "I spy a circle" and Owen has to find anything that's a circle.)
  • Rhyming Game (I say a word and he has to say a word that rhymes with it and then we switch)
  • Color mixing game ("What two colors make purple?" or "How do you make green?")
  • Active listening game (we listen to music and try to tap to the drum beat or listen for the clapping or name the different instruments we hear)
There's a great road trip bingo and other printable games Owen enjoyed here. It also helped to have a map of our trip laminated so he could see where we were going and where we had been. I laminated a small map from our local AAA office that he loved to check.

So are you planning a road trip with the kids this summer? Don't be nervous, you can totally do it! It's really only as hard as you make it and I hope these few tips will help you out. Here are a couple of additional resources that might be helpful too:

Wednesday, October 27, 2010

Pumpkin Spice Bread

I made our favorite Pumpkin Spice Bread last night and now it's beginning to smell a lot like fall around here!
Paired with a cup of yummy amaretto coffee and it was the beginning of a wonderful night!
Want the recipe?

Pumpkin Spice Bread
1 3/4 cup flour
1 1/2 cup sugar
1 tsp. baking soda
1 tsp cinnamon
1/2 tsp. salt
1/2 tsp. nutmeg
1/8 tsp. ground cloves
1/2 cup margarine
1 cup canned pumpkin (8 oz.)
1 egg
1/3 cup water

Mix it all up, pour into a loaf pan, and bake for 1 hour and 10 minutes at 350 degrees. Then enjoy the pumpkin goodness!

Speaking of recipes, I recently reorganized all of my recipes while I was in the hospital. Sooo glad I did, because that's definitely not something I could do now that life is a little more hectic with two babies.
I used plastic sheet protectors so I could pull out the recipe I'm working on and it would be splatter proof. There are 10 dividers:
  • Reference
  • Breakfast
  • Drinks
  • Appetizers
  • Breads
  • Main Dishes
  • Side Dishes
  • Cakes/Pies
  • Sweets
  • Gifts
What do you love baking for fall? I'm thinking homemade applesauce next?!

Wednesday, June 23, 2010

Disney World Tips for Traveling with Toddlers

Before our trip to Disney last week I must have read every travel guide and website I could get my hands on. I loved preparing for the trip, and I put so much work into it I thought that I would share some of my favorite tips in hopes that it helps some of you who may be planning a visit. It's a different trip when you're planning for two toddlers (our little Owen, age 2 1/2, and our nephew Noah, who is almost 4). I'll tell you what worked and what didn't for our family.
Our general itinerary was:
  • Tuesday- Fly in and grocery store (Disney Grocery List)
  • Wednesday- Magic Kingdom (I HIGHLY recommend this park for any age)
  • Thursday- "Down" day
  • Friday- Epcot (Not a lot to do for toddlers, but a great firework show in the evening!)
  • Saturday- "Down" day and fly home in the evening
If you're interested, this is our Disney Master Itinerary. I carried around a copy of this where ever we went and it came in handy many, many times.

My best packing tip is to think through what you need starting with your feet and working your way up to your head. Here's our Disney Packing Lists (with lists for the trip, plane and park).

Let me start by telling you about my favorite guide books and websites:
Best Guide Books:
Birnbaum's 2010 Walt Disney World for Kids: This was a great book written for kids, by kids. I didn't actually read it to Owen because it's written for an older audience (about 6-13 year olds), but I took a lot of the advice to heart and Owen loved the pictures.
The Unofficial Guide to Walt Disney World 2010: By far the best guide book I read! There's a ton of detailed information about every single thing you might want to know. It's not written with a bias like many of the guide books... the authors are real and they tell you what will really work and what's not worth your time!
Best Websites:
MouseSavers.com- Great section on free stuff to do on your "down" days that don't require a ticket to the park, coupons and insider info that is updated constantly.
Disney Mom's Panel- A million and one questions only moms would think up with excellent answers.
Disney Park Hours- Type in your dates and your park of choice and Disney will give you the schedule of events for that day. Very helpful in planning what time to go and when to leave the park for nap time before heading back for fireworks and the parade.

The biggest debate is whether or not you should bring your own stroller or rent one at the park. It's hard to find a picture of the park stroller, so I took one for you. This is a double stroller. The pros of renting it: it's sturdy. That's about it. It has horrible storage, it's hard to find when you get out of a ride because everyone's looks alike, it doesn't recline for sleepy ones, it's expensive and it's not good for kids under 2 because of the poor support. There... that's my opinion!
Rather than rent one, we brought our own. A huge plus to that is the fact that you'll have a stroller on the plane and on your days away from the park. We just wheeled ours right up to the gate of the airplane and checked it at the gate, then it was waiting for us as soon as we stepped off of the airplane! It's also nice because you're not allowed to take rented strollers on the Disney train (at Magic Kingdom) and we used the train a bunch to get around once we were in the park.
Another thing to think about are your "down" days. We opted for a character breakfast at the Contemporary Resort (they call it "Chef Mickey"). When choosing a character breakfast, choose it based on the characters that will be there and the price. While it was a nice time to meet each of the characters because they came to your table and spent one-on-one time with each person, it was super expensive and the kids can see the characters at the parks for "free". The food wasn't that great either for the price. If you're opting for a park hopper pass, I think the best place to see the characters would be at Epcot. I wouldn't suggest Epcot for little ones, but if you have a park hopper pass (allowing you to move from park to park throughout the day) I would suggest coming to Epcot after your nap time in the later afternoon. Then you could see the characters and stick around for Epcot's fabulous light and firework show.
Our favorite "down" day activity was taking the monorail around to each of the different resorts and touring them, then going to downtown Disney for dinner or lunch at Earl of Sandwich. Both activities do not require a park pass and are free for touring. Downtown Disney has a ton of great activities and shops for a rainy day too.

What tips do you have? What questions do you have? I'd love to hear from you!

Thursday, June 3, 2010

Ultrasuede Scrap Pad Tutorial

How familiar is this scene: You're in the car about to drop off your dry cleaning and you want to make a quick note of just how many of your precious shirts you're dropping off. You look around and there's not a scrap piece of paper anywhere.
So you grab one of the scarce "just in case" napkins from your glove compartment and scratch out a note to yourself. Wouldn't it be nice to have a cute little scrap pad close by for times like these?
I thought so too, so I made these using recycled materials. And here's a tutorial just for you. You'll need:
  • Ultrasuede samples (but you could use any fabric really, mine are about the size of a business card)
  • Recycled paper (think: an old book you could cut up, junk mail, etc.)
  • Ribbon scraps from old projects
  • Glue
  • Sewing machine
  • Size 110/18 needle (for heavyweight fabrics)
When a new line of fabric comes in sometimes fabric stores will sell the discontinued fabric samples. (Just ask!) That was the case with this ring of multi-colored ultrasuede swatches.
These colors are beautiful and I had the best time pairing them up for my little scrap pads. I think ultramarine and cardinalle is my favorite pairing (great names!).
For the scrap paper, I used leftover book pages from this project, cut just a little smaller than the ultrasuede "covers." Be sure to change out your sewing machine needle! Usually I use a size 90/14 needle, but I switched to a 110/18 size for this project. The thicker needle won't break as easily. (Also, set your machine to make tight stitches, longer stitches will pull out.)
Once you have your two "covers" and scrap paper inserts in place, use a binder clip to secure it all together on the side you won't be sewing. Next, use a pencil to mark a line on the edge of the paper where you would like your seam to go.
I wanted my scrap pads to be thicker than my machine was happy sewing for me, so I split the pad in half and stitched the two halves separately. That's where your little pencil line comes in handy. Make sure your needle is lined up with that line and stitch half of your book...
then the other half.
My ultrasuede covers already had a hole punch in them, so I decided to punch the paper too.
Then I glued the front and back sides of the pad together in the middle, keeping the glue above the seam.
I finished the pad off with a piece of curly grosgrain ribbon. You know what I love about these pads? Because we sewed them together, they have a nice perforated edge that makes tearing the sheets off so easy!
There you have it! Scrap pads never looked so good!
P.S. I've added lots of new projects to my list of "Projects I Want To Attempt" over there on the right column. One of them gives you a clue to the dowel rod, fabric and magnet project I'm currently working on! Can't wait to show you!