Showing posts with label Babies. Show all posts

Friday, February 1, 2013

3 Easy DIY Baby Gifts

1. Easy Embroidery
Embroidery projects are so easy and rewarding. (A great couch project for when you're on bed rest, just sayin'.)  You don't need to know any fancy stitches to make a beautiful piece that you'll admire in your nursery for years to come.  I used this pattern from Amy Bindel.  It is no longer on her blog, so you'll need to print it from the pin if you're interested in using it.  Really you can use any drawing, just trace it lightly with a pencil on to your fabric and stitch over your markings.  
I have a lot of great resources on my Sewing Pinterest page for free embroidery designs and basic stitches.  Have fun with it, throw the embroidery rules to the wind and just stick that needle in the fabric and get started, I promise you'll thank me.

2. Baby Booties
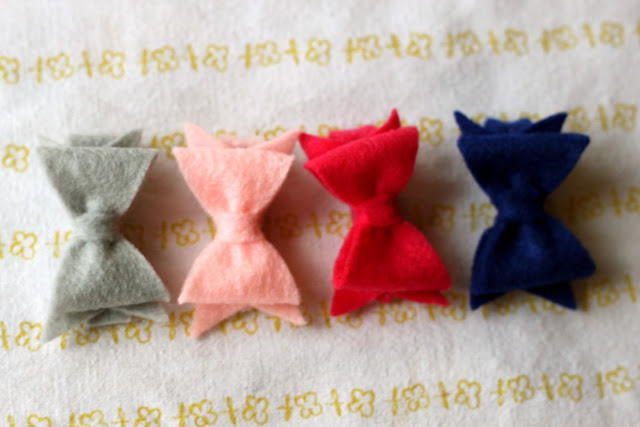
Are you totally sick of my gray felt and pink bows yet?  I can't walk up the stairs a bunch, so I've got to squeeze every bit of creativity out of the supplies I have within reach.  I promise, there's only one more project I want to show you with my 68 cent sheets of felt, but I'll wait until Laney is born to reveal that one! :)  On to the current project... baby booties!
I used Tao of Craft's Modern Baby Bootie Tutorial to make these, but I did it with felt.  If I made these again I would definitely double up the felt to make it more sturdy or use leather like my Little Man Shoes from forever ago, remember those?!

3. Paci Clip
These are just the easiest to make, and don't you love this ruffly ribbon?!  Tutorial here.

Friday, January 25, 2013

How to Make Felt Hair Bows that Stick!

Please visit the updated post and find lots more inspiration here.
Finally, a hair bow that will stay in your little girl's hair when she doesn't have any!

I don't think I finally got hair until I was about 2 or 3 years old.  I'm sure my mom fielded a bunch of "How old is your son?" questions, and I'm anticipating the same for my little girl.  Since she's not here yet (anticipated c-section birthday on Feb. 25) you'll have to settle for me as a model. 
I did a bunch of research on which clips were the best and the secret trick to making the hair bows stay in.  You'll never guess what it is!  Drawer liner!

Let's get started!
You'll need:

Have I told you before that I'm not very girly?  I'm not in to ballerinas and tutus and tulle.  No thanks.  When I was little I had a Mr. T lunch box.  Yes, the huge guy from the A-Team who didn't like to fly on airplanes and wore about 10 lbs of gold chains around his neck, yeah him.  I was obsessed.  Anyway, I inherited these hair clips and cut off the tulle so I could re-use the perfectly good clip underneath.  You could also buy the metal clips at Sally's Beauty Supply or I've even seen them at Michael's.
Once I freed my hair clip from all that ick I was ready to get started.  

Cut a strip of felt that's as wide as your clip and long enough to wrap around starting where my thumb is and continuing around the whole top portion of the clip.  It's key not to have any felt on the bottom of your clip because you want that part of the clip to be in contact with the hair directly.  Glue that down.  Be sure to open your clip so that you don't glue the clip closed.
Round off any excess felt.
Next, cut a piece of drawer liner that's as wide as your clip and as long as the inside top portion of your clip (remember we want to keep the entire bottom part of the clip clear of anything.)
 Trim off the excess shelf liner.
 It will look like this when you're done.
 Finally, hot glue your bow to the top of the clip and you're done!
Repeat until you're sick of making them or until your thumbs can't take any more hot glue gun burns, which ever comes first.
If you'd rather make these using grosgrain ribbon, Make It and Love It has an awesome tutorial and some sticky sweet baby pictures here.
Now you moms of girls will have to tell me how you like these.  Bonus points if you can remember any other characters from the A-Team!  I love it when a plan comes together!

Sunday, January 20, 2013

How to Make An Elephant Doorstop (that's too cute for the floor!)

Please visit the updated post and find lots more inspiration here.

Can I show you how to make an elephant doorstop that's bursting with so much cuteness you won't want to put it on the floor?
The plan for this sweet thing was to have her hold my little girl Laney's door open, but the thought of kicking it out of the way every time I wanted to close the door made me change my mind... Miss. Elephant is now safely perched on top of Shel Silverstein on the bookshelf and far away from our feet.  Are you relieved?  I am.
Wanna make one?
You'll need:

  • This pattern for the elephant
  • This pattern for the bow
  • Gray felt
  • Pink felt
  • Decorative scrap fabric
  • Needle, embroidery thread and scissors
  • Straight pins
  • Plastic can gripper (that's my secret weapon!)
  • Pebbles
  • Stuffing

First, you'll want to print this pattern (landscape-style at 250%) and piece it together.   I always like to give credit where credit is due, but it was super hard to find out who originally created this pattern.  One source said it was from an old Family Fun magazine, so we'll go with that.

Use the pattern to cut each of your pieces out of felt.  For the ear pieces, I cut two pieces out of fabric a little larger than the pattern so that I could turn it under before stitching, and two pieces out of felt (for the backs of the ears).**

Now the fun part!  Piece the gray felt pieces together and pin them in place. Start whip stitching the elephant together (I started at the back of the elephant's heel and went up towards the butt.)  If you don't know what whip stitching is, check out this youtube video.  (You're going to thank me for the awesome music!)
One quirky thing about the elephant pattern is that it didn't include a tail pattern piece so I made up my own.  I just cut a rectangle piece of felt about an inch or so wide and about 2.5-3 inches long.  I snipped the ends of one of the short sides of the rectangle and then rolled the felt up, whip stitching the roll closed.  The picture above should help you.

The picture below is how I pieced the tail in.  You're looking at the inside of the elephant's butt.
Keep whip stitching around the rest of the elephant.  When you get to the trunk be sure to put in some stuffing WHILE you stitch it closed.  It will be super hard to get the stuffing in there if you don't do it this way.
Now for my secret weapon... pull out that freebie can gripper that you got at the fair (the flexible plastic one) and use it to grip your needle when it gets really hard to pull it through two layers of felt and the fabric on the ears.  Works perfectly doesn't it?!

**Be sure to follow my above instructions about the ear fabric.  If you cut the fabric a little larger than the felt then you'll have space to turn the fabric under before you stitch it to the ear backs (made out of felt).

One more important note... TRUST THE PATTERN!  While you're stitching, line up the pattern pieces you cut perfectly, don't start making adjustments to the pattern while you're stitching because you think it's not lining up correctly.
When you're all done stitching the elephant the underneath will have an open flap for stuffing.  Put the stuffing in first (just a bit in the bottom of the feet too) then fill in the rest of the legs and the underneath belly with pebbles for weight.  

If you're not planning on using your elephant for a door stop or a book end, just omit the pebbles and use only stuffing.
 As a finishing touch, I embellished with a pink bow using this pattern.


 Can't wait to show you the rest of Laney's room!  We're aaaaallmost done.

Wednesday, December 19, 2012

The Beginnings of a Nursery

You'll never guess what I've been up to lately?!  Nothing. Absolutely nothing.  Doctor's orders.  I'm on modified bed rest.  Fortunately this time I'm not at the hospital like last time, but I'm only 29 weeks, so I guess anything can happen.

For now I am counting my blessings.  To be home among all of the sweet little voices and the anxiety for Christmas is something I don't take for granted!  The hospital is a wonderful place, but it is just so sterile and lonely this time of year.  It's good to be home!

My sweet little girl, Laney, is still happily in utero and her nursery is still a very boyish shade of blue.  We don't have a thing ready for her yet, so the planner in me got to work.  If I can't paint walls and organize a closet in real life I'll do it virtually!  So far this is what I've come up with... we'll paint the walls a pale gray and (if I can convince the hubby it's a good idea!) we'll stencil the back wall with a pattern.  Long white drapes, recovered rocking chair maybe in gray damask, pops of pink and a little bit of a vintage vibe if I can figure out how to squeeze that in there.

Tuesday, July 31, 2012

And Baby Makes FIVE!

I don't know how it is possible for one month to be so very bonkers, but here it is almost August and I haven't blogged a single time this month.  Well, that just won't do.  
I can't show you what all of my creative juices have been pouring into lately, you'll have to wait until March.  March 3rd to be exact.  I've been busy making another little one!  Yippee!! :)
You'd think by now that my body would be like, "Oh, we're doing the kid thing again?  I've got this!"  But I've been so sick.  If you've been reading for a while you know that my pregnancies tend to be very... um, eventful!  So we are praying that this pregnancy is extra boring.
I can't tell you how soothing it was though to see my sweet little one on that ultrasound yesterday, to hear that heartbeat and watch those teeny tiny little arm nubs "waving" at us.  Healthy pregnancies are nothing short of a miracle.  Life is a miracle and I don't take that for granted.

I've been so blessed to have the help of my sweet hubby.  Just last night he made the kids dinner, cleaned the kitchen and put them to bed all after working a full day of work!  What a guy!

I hope you all are doing well and enjoying these long summer days.  I love you girls too and am so thankful for your friendship!

(Pictures are from some of our July adventures... Pullen Park in Raleigh, Washington DC and Holden Beach, NC)

Wednesday, May 23, 2012

How in the world to register for your first baby!

So you've gotten the good news that you're expecting your first little one!  Congrats, you're going to love being a mom.  Seriously.  But let me guess that right now you're a mess of emotions and queasiness?  I get it.  I've been there.  
I remember stepping foot in Babies"R"Us for the first time and leaving with big crocodile tears streaming down my cheeks.  I wanted to make the right decisions about what to buy, but I had no clue what was needed.  What should I buy used?  What could I borrow?  My goodness, how in the world do I choose which bottle is right off of the huge bottle wall??  Do I even need bottles if I'm going to breast feed?   Oh no, here comes the emotion...

I had a sweet friend who is a few years older sit me down and with a pen and paper I wrote out all of her suggestions.  I read a bunch of books and combined it all together (with lots of tweeking after my babies were born) to come up with this list.

I hope it's helpful.  Clearly, your preferences will be different than mine, but if you want an experienced mom's honest opinion, don't even think about registering for that wipes warmer and head over to the stuff you'll actually use.  I've dished it all on the list.  Pass it on to your girlfriends, they will thank you (mine have!)

  And relax, you're going to be a great mom!
If you're interested in how to organize all of these things, check out my post all about how I tamed the baby clutter.  Feeling like your little one needs a homemade paci clip, two-sided burp cloth or hanging crib toy organizer?  You'll find all the tutorials here.

And shameless as it is, I have to put in a plug for my Etsy shop... I'd be thrilled to paint some nursery artwork for you that matches your bedding perfectly!


Monday, May 7, 2012

Painting for a Tucker Girl

The Tucker boys are taking over.  They were 11 and 0 until now... 
My sister-in-law Angie just found out that the sweet little one she has been carrying is a GIRL!!  Our first Tucker girl!  What in the world are we going to do with a girl around here?

Well, paint for her of course!  

Angie chose this painting for her registry...
Oopsy Daisy Too Aqua Blossom Wall Art from Target
And this bedding...
Lana Nursery Bedding by Pottery Barn
Can I be honest?  I liked the bird houses, but didn't really love the Target painting.  I do love the Pottery Barn bedding.  So I combined the idea of the bird houses with the flower shapes that I liked from the bedding and came up with something new for the baby shower this weekend.
(And yes, the sun is as big as the flowers and the birds are going to have to drink a lot of slim fast to get in to their homes at night.  It's my world, mmmk?!)
My newest little niece will be named Lyla Adelaide.  While the rest of us have had to marry in to get the Tucker title, she's the first Tucker girl in something like 40 years!
I can't wait to meet her.  Let's hope she likes birds! :)

Friday, May 4, 2012

My Mommy Secrets Revealed

Hey Girls, I'm chatting it up about my adventures in being a mommy over at Thriving Home today.
I'm talking about what keeps me grounded, my strengths and failures and a couple of my best mommy secrets and favorite products.  I hope you'll visit.  I think you'll like Polly and Rachel!
 Have a great weekend and I'll see you next week!

Thursday, April 19, 2012

Spring Line: Baby Love!

The shop is blooming with baby love right now. Come visit, won't you?

Special thanks to my beautiful newborn baby model, Emmie!
(She's the one we welcomed with a Peter Rabbit Baby Shower.)